Using Lists to Order
This page has information about how to use lists to manage your pantry guide and quickly order.
- View lists
- Creating a list
- Quickly create lists
- Deleting and renaming lists
- Viewing items and ordering from your lists
- Adding a product to a list
To return to the main help directory, please click here.
View Lists
Website Instructions
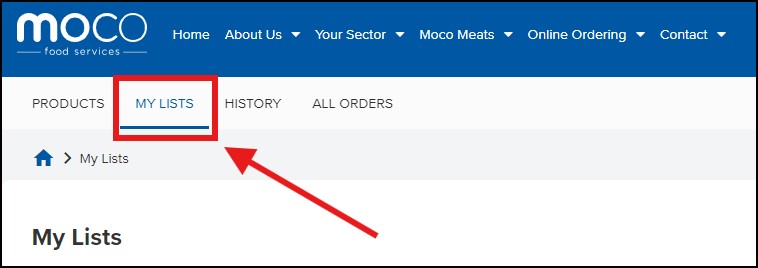
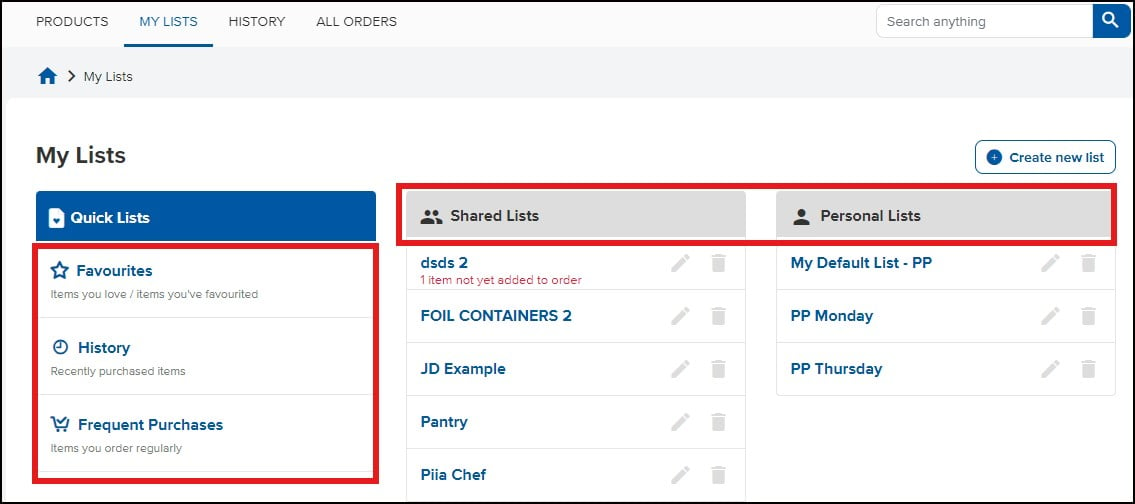
- On the website navigate to the header 'My Lists'
- You will be taken to a page with all your lists.
• ‘Favourites’ show the items that have been marked as favourites either from the product catalogue (overview) page or ‘Product Details’ page. You can add these items from ‘Favourites’ to your lists (‘Shared’ and ‘Personal’). You can also add items to cart from ‘Favourites’.
• ‘History’ shows the recently purchased items. You cannot remove items from this list, but you can add them to ‘Favourites’ and to cart.
• ‘Frequent Purchases’ contains the items that are regularly ordered. From this page you can add the items to different lists (‘Shared’ and ‘Personal’) and add them to cart.
• ‘Shared Lists’ allow you to share your lists with other users
• ‘Personal Lists’ are your own lists, visible to you only.
Mobile App Instructions
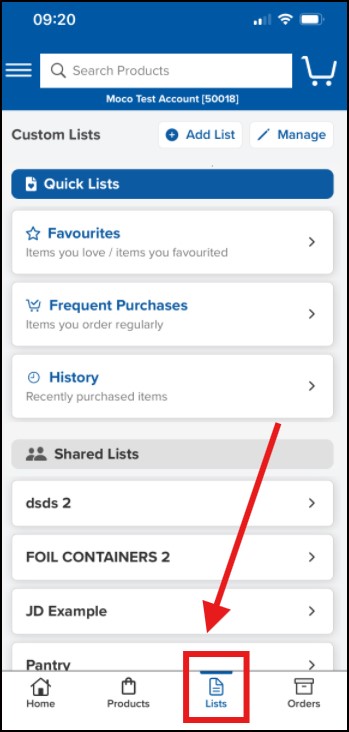
- Click footer icon ‘Lists’ and you will see all your lists: ‘Quick Lists’, ‘Shared Lists’ and ‘Personal Lists’
Create a List
You can use lists like a favourites tool or set up lists for different storage areas, venues or for new menu ideas. You can create and manage your lists as you see best.
Your 'Frequent Purchases' list contains standard items that you regularly order with MOCO. You cannot delete or rename this list. However, you can set up other custom lists that can be deleted or renamed.
Website Instructions
Step 1. To Create a new list, click on 'Create List'

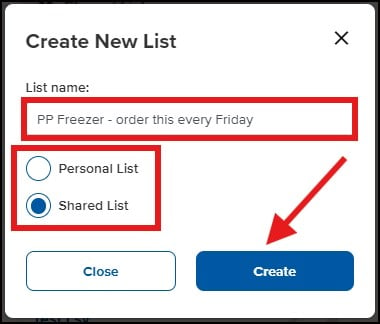
- Step 2. Name your list, specify whether it will be a personal or shared list and click on ‘Create’
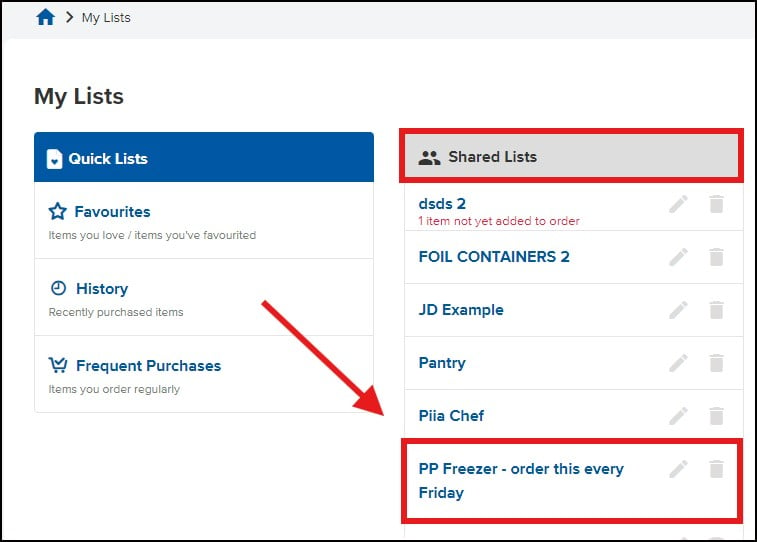
Step 3. Once you click 'Create', your list will be added.
Mobile App Instructions
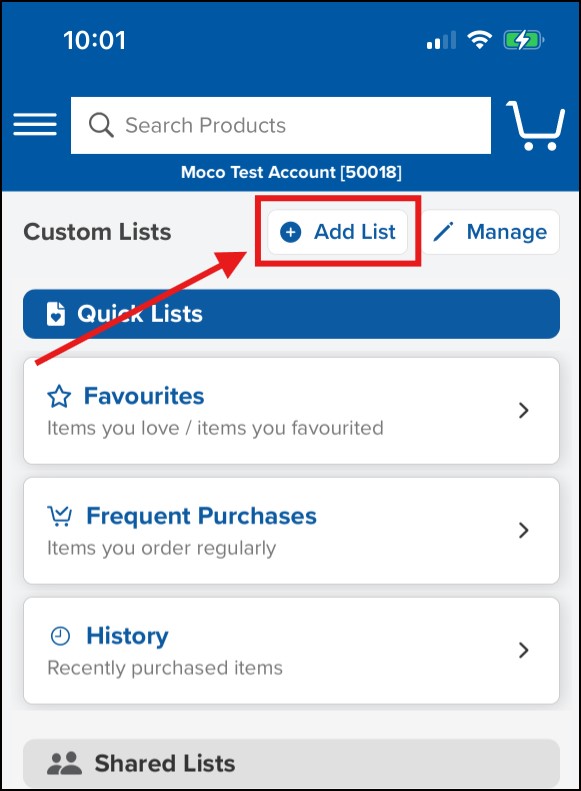
Step 1. To create a new list in the App, click on ‘Add List’ in the header
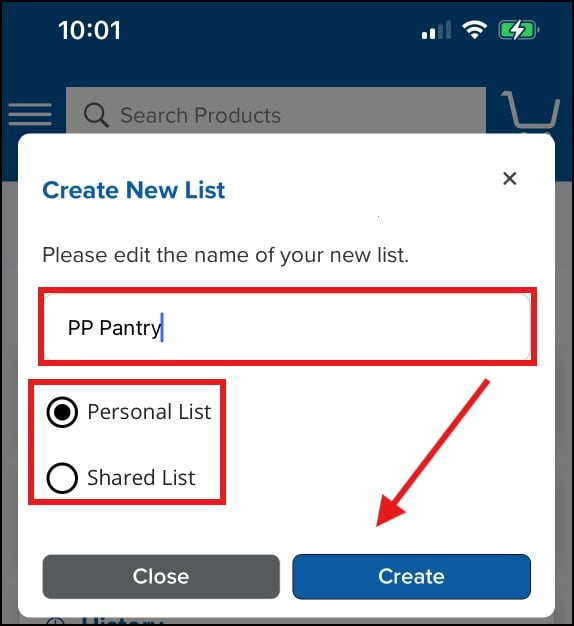
Step 2. Name your list, specify whether it will be a personal or shared list and click on ‘Create’
- Once you click 'Create', your list will be added.
Updating Lists
You can easily manage items in your lists from ‘Frequent Purchases’ and ‘Favourites’. This allows you to add items or delete them from one or several lists at the same time. This can be done both on the website and in the App, process is the same for both.
Step 1. Open the "Frequent Purchases" list and click on the blue icon on the left.
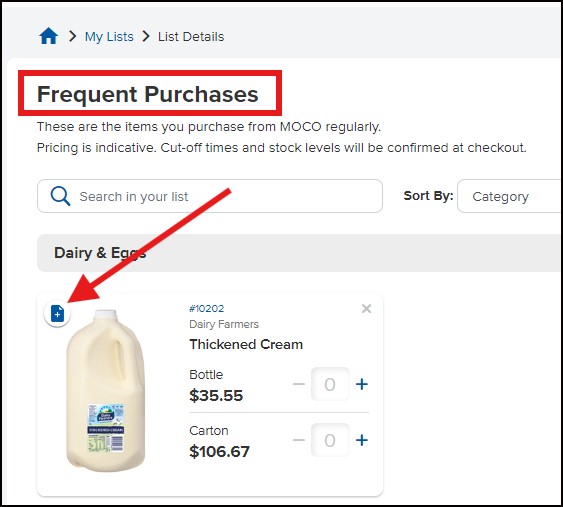
Step 2 - Click "Copy Items to List(s)
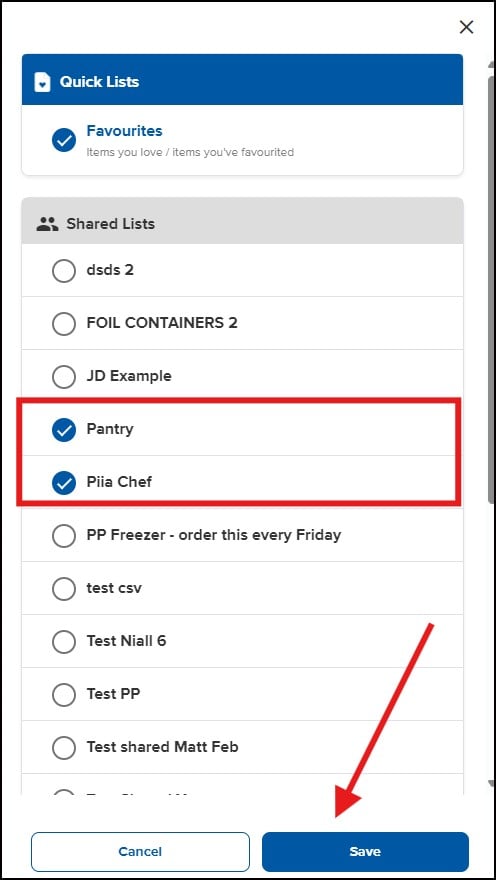
- You will receive a confirmation that the update has been done

Deleting & Renaming Lists
Website Instructions
Deleting a List
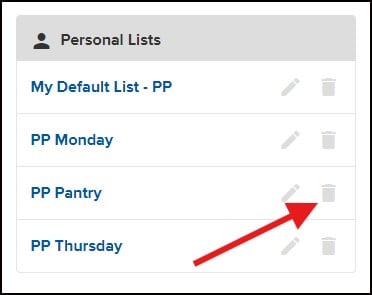
Step 1. Click on the rubbish bin icon
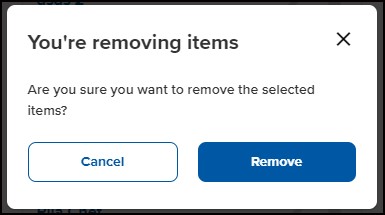
- Step 2. Confirm by clicking 'Remove' and the list will be deleted
Renaming a List
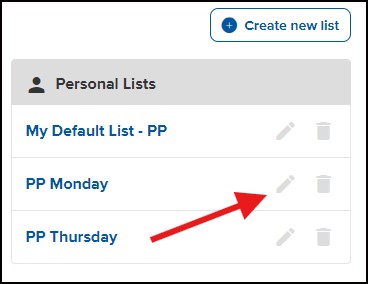
Step 1. Click on the editing icon
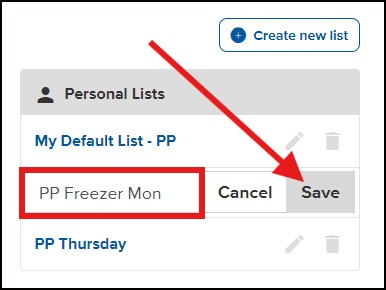
Step 2. Rename your list and click ‘Save’
Mobile App Instructions
Deleting a List
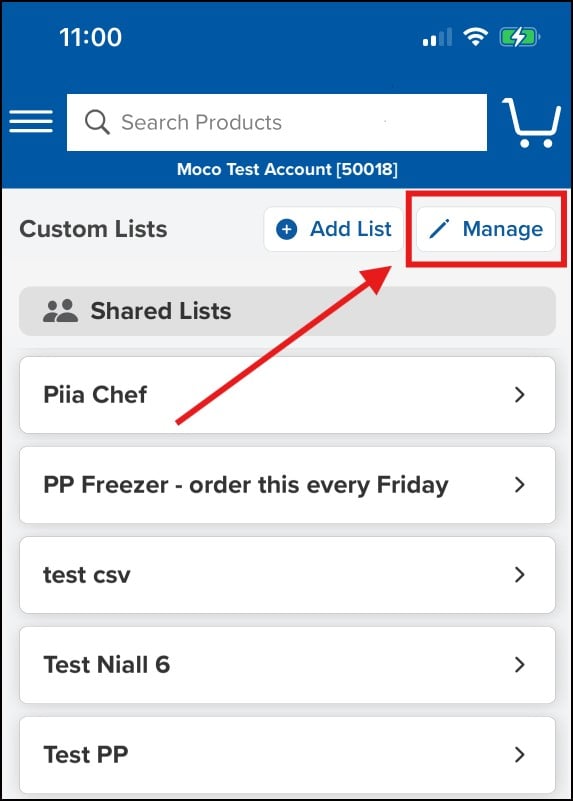
Step 1. Click on the header 'Manage'
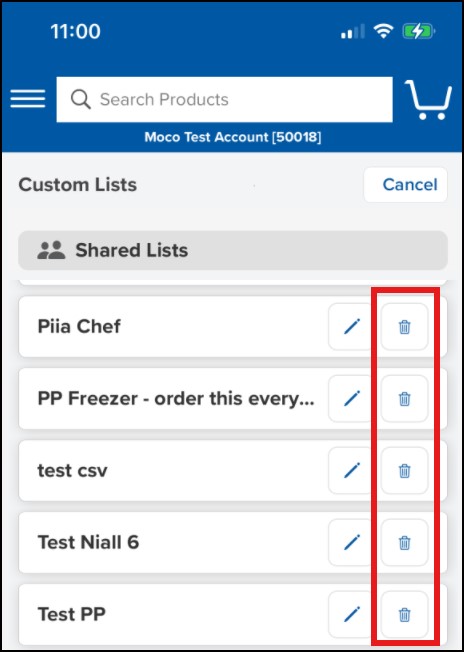
Step 2. The options to edit and delete appear on the right. Click on the rubbish bin icon.
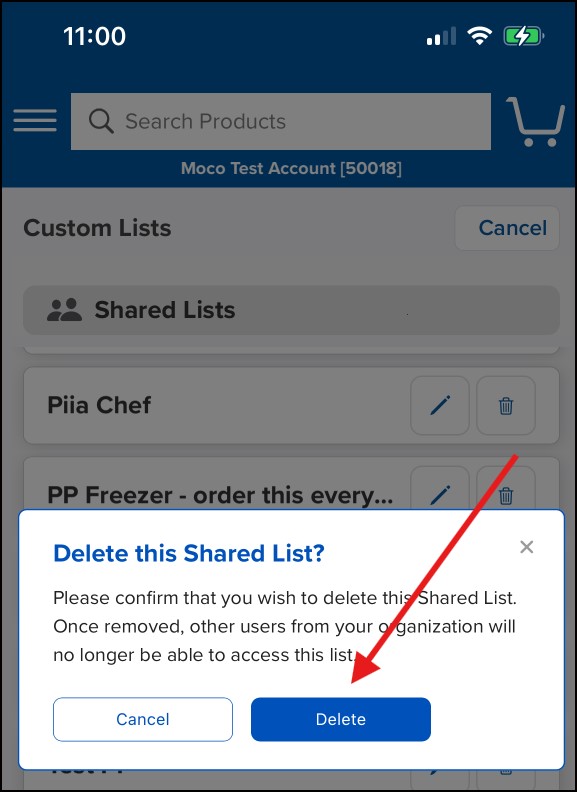
Step 3. Confirm by clicking ‘Delete’ and the list will be deleted
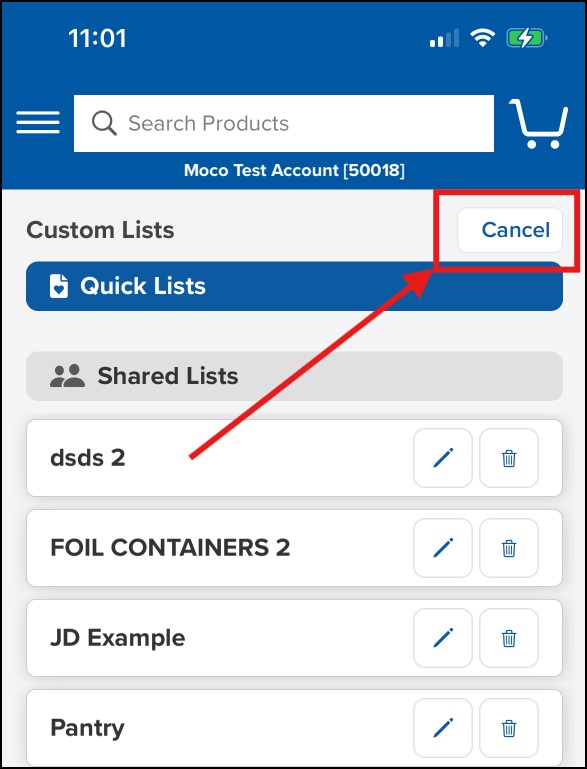
Step 4. You will be taken back to the lists page, click on the header ‘Cancel’, this will close the editing mode
Viewing Items and Ordering From a List
Website Instructions
- Open a list and you will see a list of all items
- You can delete items from the list and use ‘Sort By’ to view the items either by category or in alphabetical order.
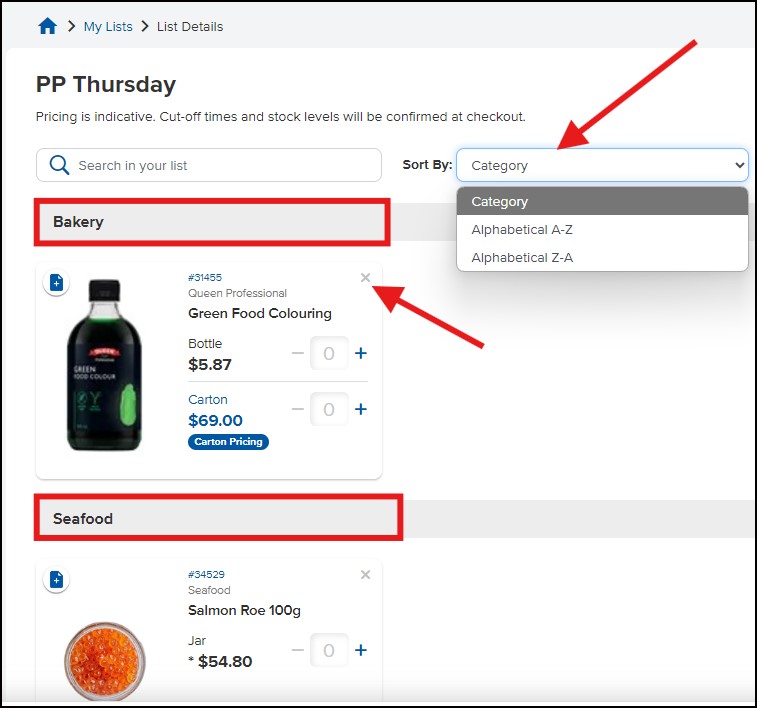
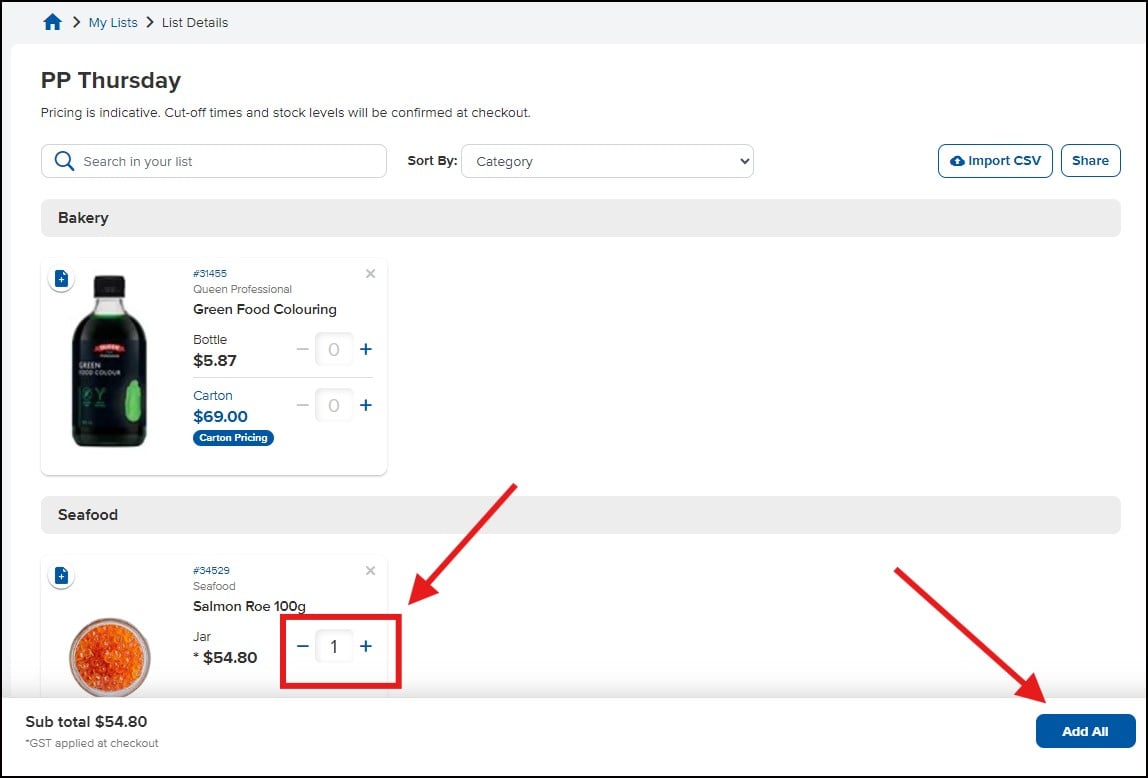
- To order from your list, update the quantities next to items you want to order
- Click ‘Add All’ and all items on the list with quantities >0 will be added to cart. You can view and modify the quantities in the cart before checkout.
Mobile App Instructions
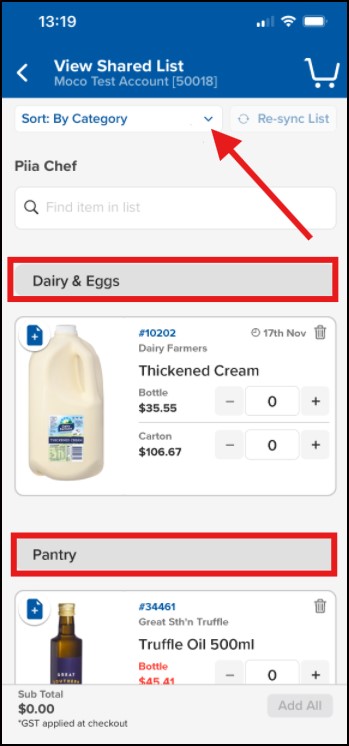
- Open a list and you will see a list of all items
- You can delete items from the list and use ‘Sort By’ to view the items either by category or in alphabetical order
- Different options will appear (appearance will be slightly different depending on whether you’re on iOS or Android).
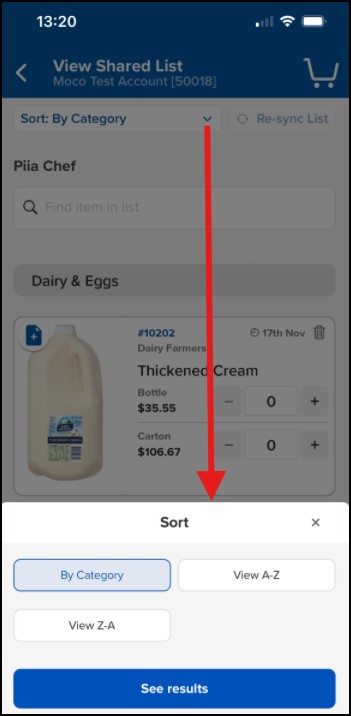
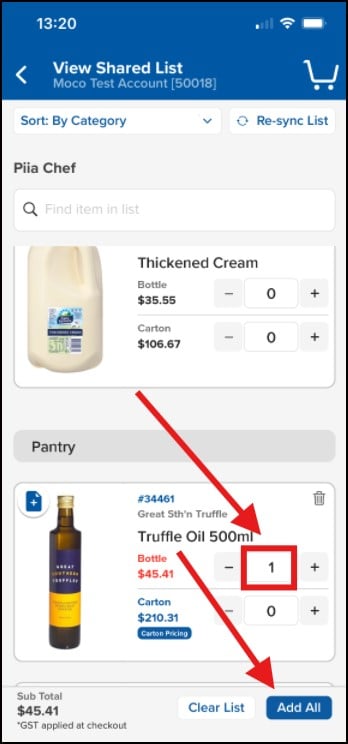
- To order from your list, update the quantities next to items you want to order
- Click ‘Add All’ and all items on the list with quantities >0 will be added to cart. You can view and modify the quantities in the cart before checkout.
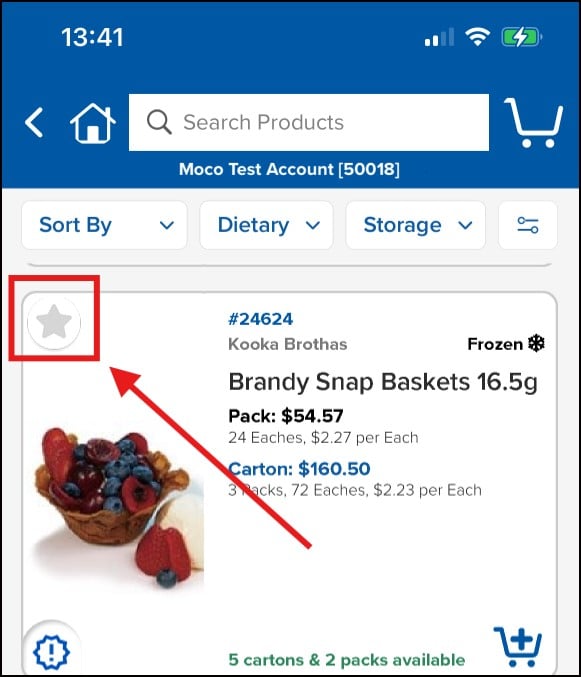
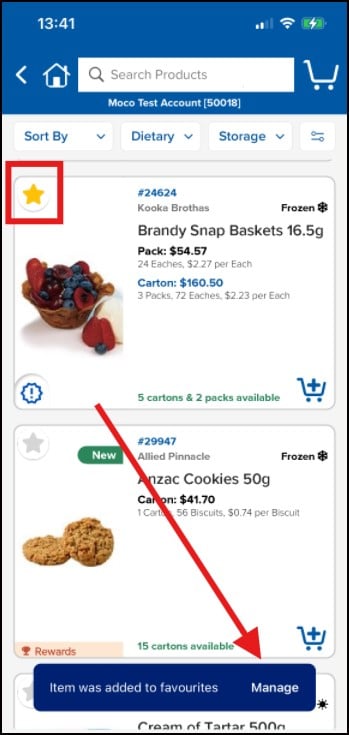
You can easily add products to your lists by clicking on the greyed-out star on the left of each item.
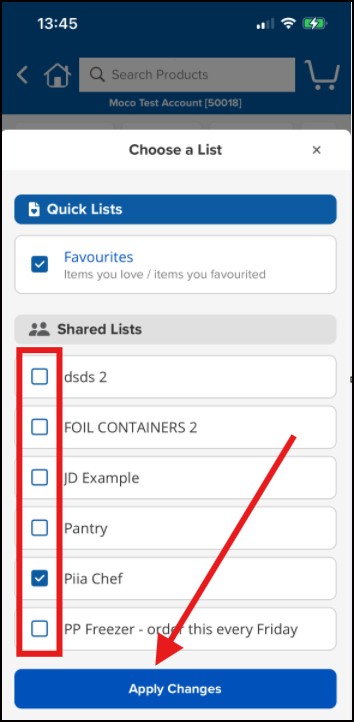
- Once you click on it, you will be presented with your existing lists, and you can add the item to one or multiple lists.
